Feb 4, 2009

Google Notebook Gadget Resizer

The default height of notebook gadget is 200px , it’s too short that need often to scroll down/up , so that write a script to change the height.
image
Install Greasemonkey
https://addons.mozilla.org/en-US/firefox/addon/748
image
User Script:Google Notebook Gadget Resizer
http://userscripts.org/scripts/show/41679
image
Result:
image

Code:

// ==UserScript==
// @name          Google Notebook Gadget Resizer
// @description   To change height of gadgets in iGoogle
// @include       http://www.google.com/ig*
// @include       http://www.google.com.tw/ig*

// @author        parkghost@hotmail.com
// @version       1.0
// ==/UserScript==

// This script are working on Google notebook gadget and some similar gadgets which content type is url and not using dynamic-height feature.
//
// you can fellow below instruction to modify default height of Google notebook gadget or add more gadget to apply new height.
//
// 1.input "about:config" in url box
// 2.search "greasemonkey.scriptvals.userscripts.org/Google Notebook Gadget Resizer.oGadgets"
// 3.The properly is a array of url pattern with height that can modify of you want to.
//
// default:
// ({'http://www.google.com/notebook/ig':"600px", 'url pattern':"400px"})
//
// The url of gadget you could look at page source that place in iframe tag.(ex.http ://87.gmodules.com/ig/ifr?view=home&url=http://itszero.googlepages.com/iGoogleTVSchedule.xml&nocache=0&up_timeRange=0&up_showPrograms=6&up_fontSize=0.75&up_favoriteChannels=&up_defaultChannel=74&lang=en&country=us&.lang=en&.country=us&synd=ig&mid=87&ifpctok=-5100993727886241321&parent=http://www.google.com&extern_js=/extern_js/f/CgJlbhICdXMrMAo4ACwrMBA4ACwrMBI4ACwrMBM4ACwrMBU4ACw/GgLq_VyeDu0.js)
//
// The URL parameter is good to become a URL pattern.
// http://itszero.googlepages.com/iGoogleTVSchedule.xml

var oGadgets = {'http://www.google.com/notebook/ig':'600px','url pattern':'400px'};
var oGadgetsStr = GM_getValue('oGadgets');
if(oGadgetsStr){
 oGadgets = eval(oGadgetsStr);
}else{
GM_setValue('oGadgets',uneval(oGadgets));
}
var oFrames = document.getElementsByTagName('iframe');
for(var i=0 ; i < oFrames.length ; i++){ 
 for(var key in oGadgets){
   var re = new RegExp(key); 
   if(re.test(oFrames[i].src)){
     oFrames[i].style.height = oGadgets[key];
   }
 }
}

Resources:

Greasemonkey Manual:API
http://wiki.greasespot.net/API_reference

Managing Gadget Height
http://code.google.com/apis/gadgets/docs/ui.html#Dyn_Height

Jan 5, 2009

Write EJB Client
The JNDI could support java client  to get EJB instance from J2EE Container.
We have two type configuration for JNDI. First one,To hardcode properties in program look like listing 1, another one is put properties in file jndi.properties and place on root directory of classes.
Listing 1
Properties props = new Properties();        
props.setProperty("java.naming.factory.initial", "org.jnp.interfaces.NamingContextFactory");
props.setProperty("java.naming.provider.url", "localhost:1099");
InitialContext ctx = new InitialContext(props);
helloworld = (HelloWorld)ctx.lookup("HelloWorldBean/remote");


Listing 2 (jndi.properties)


java.naming.factory.initial=org.jnp.interfaces.NamingContextFactory
java.naming.provider.url=localhost:1099


Ps. if application depoly on EJB container the container will import jndi properties form default configuration.

Sep 24, 2008

Linux remote desktop using VNC

Steps:
1.install vncserver

[root@hostname ~]#yum install vncserver

2.startup vncserver

[root@hostname ~]# service vncserver start
Starting VNC server: no displays configured [ OK ]

3.change environment who user you want to login

[root@hostname ~]#su – root

4.startup a vncserver instance and assign login password

[root@hostname ~]# vncserver

You will require a password to access your desktops.

Password:
Verify:

New 'hostname:1 (root)' desktop is hostname:1 http://xx.xx.xx.xx:5801

Creating default startup script /root/.vnc/xstartup
Starting applications specified in /root/.vnc/xstartup
Log file is /root/.vnc/hostname:1.log


5.stop the vncserver instance.

[root@hostname ~]# vncserver -kill :1


6.Modifiy default startup script /root/.vnc/xstartup


# Uncomment the following two lines for normal desktop:
unset SESSION_MANAGER <= remove the mark
exec /etc/X11/xinit/xinitrc <= remove the mark


7.Use Vnc Client as like OpenVnc and UltraVnc to connect the server.
Resources:
http://forum.icst.org.tw/phpbb/viewtopic.php?t=11500
http://linux.vbird.org/linux_server/0310telnetssh.php#vnc

May 29, 2008

學生電腦安裝手冊

在挖資料時發現以前寫的安裝手冊,把它丟上來給有需要的人
-------------------------------歷 史 的 分 隔 線-----------------------------------
一、... 傳播架構... 1
二、... 硬體環境... 1
三、... 軟體環境... 1
四、... Step 1前置步驟... 2
五、... Step 2製作開機映像檔... 3
六、... Step 3製作PXE開機選單... 8
七、... Step 4製作Ghost映像檔... 12
八、... Step 5多點傳播... 16
九、... Step 6修改各PC端IP、Hostname 19
十、... Step 7測試群組與IP.. 21
十一、參考資源... 21
十二、附錄一... 22
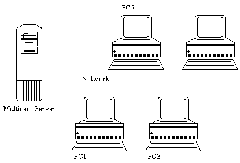
一、 傳播架構
clip_image002
PC1為製作映像檔之電腦,Multicast Server為傳播映像檔給所有電腦之伺服器,其傳播過程分為兩階段,其一:PC1 經由網路備份映像檔至Multicast Server (Step1 - 4),其二:Multicast Server 經由網路還原映像檔給所有電腦,過程中所以使用的技術(DHCP、TFTP、PXE、GHOST)可於參考資源中查尋。
二、 硬體環境
l PC兩部(一台為Server另一台為製作映像檔用)
l PC需有PXE開機功能
l PC與Multicast Server需連接網路,屬同網段
三、 軟體環境
l Norton Ghost v8.2 Corporate Edition
l 3com Dynamic Access Boot Services
l Tftpd32 v2.83

四、 Step 1前置步驟
PC1:
依老師需求規劃分割區、安裝系統、使用者帳號和權限、網路群組名稱、TCP/IP資訊、軟體
Note
若有多個系統則考量是否需另外安裝開機選單
部份軟體在不同使用者會有註冊檔、權限問題,需登入各使用者環境,執行各類軟體測試(參閱附錄一)

Multicast Server:
安裝Ghost Enterprise、DABS、tftpd32
Note
安裝3com DABS 時安裝種類為Server
clip_image004

五、 Step 2製作開機映像檔
Multicast Server:
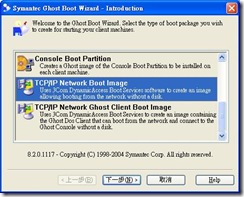
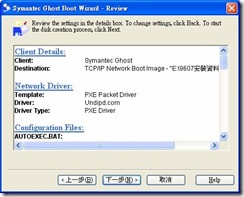
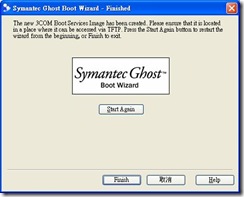
執行Ghost boot wizard
clip_image006
挑選TCP/IP Network Boot Image
clip_image008
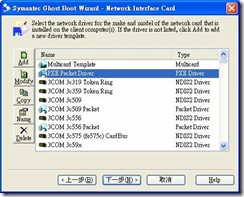
挑選PXE Packet Driver
clip_image010
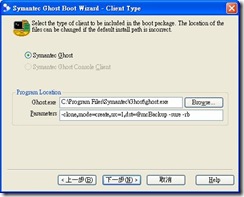
clip_image012
clip_image014
l 製作Ghost映像檔參數(用於Step 4):以Session Name 為Backup
-clone,mode=create,src=1,dst=@mcBackup -sure –rb
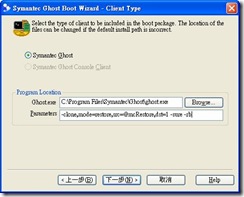
l 多點傳播參數(用於Step 5): 以Session Name 為Restore
-clone,mode=restore,src=@mcRestore,dst=1 -sure -rb
clip_image016
clip_image018
clip_image020
clip_image022
clip_image024

六、 Step 3製作PXE開機選單
Multicast Server:
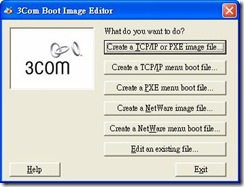
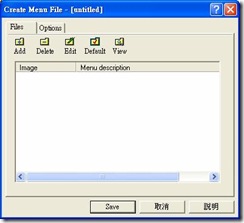
執行Boot Image Editer
clip_image026
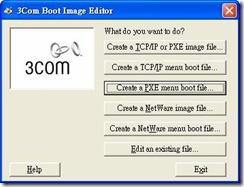
按Create a PXE menu boot file
clip_image028
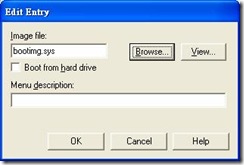
按Add
clip_image030
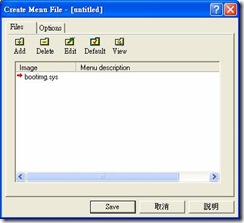
按Browser挑選開機檔案存檔位址
clip_image032
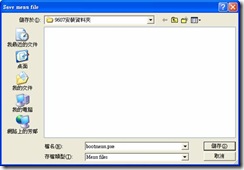
按Save
clip_image034
選取開機選單存檔位址(需與開機映像檔為同一資料夾)
clip_image036
Note
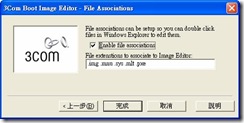
第一次執行Boot Image Editor則會出現下列畫面(皆預設選項即可)
clip_image038
clip_image040
clip_image042

七、 Step 4製作Ghost映像檔
Multicast Server:
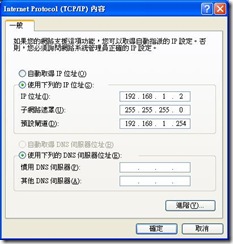
我的電腦→控制台→網路連線→區域連線→內容
更改為虛擬IP(可避免與實體IP的衝突)
clip_image044
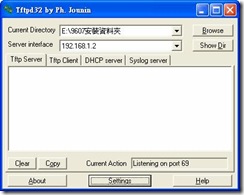
執行TFTPD32
按Settings
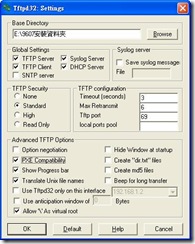
clip_image046
勾選PXE Compatibility,按OK
clip_image048
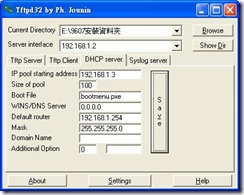
設定下列資訊,按Save
clip_image050clip_image052
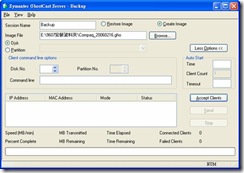
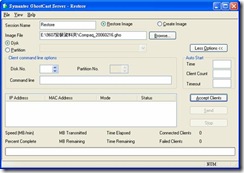
啟動GhostCast Server
設定下列資訊
clip_image054
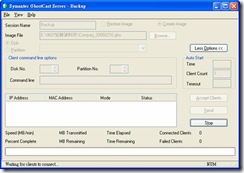
按Accept Clients
clip_image056
PC1:
進入BIOS將網路開機功能開啟
重新開機後PC1會經由網路取得 IP設定→開機選(bootmenu.pxe)→開機映像檔(bootimg.sys)→進入Ghost畫面與開始傳輸)
Note
如果在備份或還原過程過於緩慢或過多PC中斷,可能有電腦正在傳送大量封包或病毒干擾(將其暫停傳輸)

八、 Step 5多點傳播
Multicast Server:
啟動GhostCast Server
設定下列資訊
clip_image058
Note
這時的開機映像檔參數為下(作法請方參照Step 2)
clip_image060
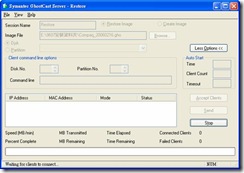
按Accept Clients
clip_image062
先執行下列PC步驟,當所有電腦都連線時即可按下Send開始傳送

所有要安裝的PC(需與PC1為同一機型):
進入BIOS將網路開機功能開啟
(重新開機後PC1會經由網路取得bootmenu.pxe並執行預設的bootimg.sys進入Ghost畫面與開始傳輸)
Note
如果已設好PXE的電腦可以用Wake-On-LAN的方式分段式的啟動
MC-WOL ethernet-address [/a ip-address] [/p password]
Example1: MC-WOL 00:01:02:58:A3:C7
需注意如同時啟動過多電腦則會導致bootimg.sys傳輸中斷

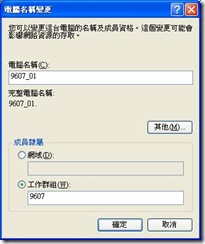
九、 Step 6修改各PCIPHostname
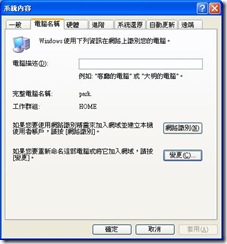
我的電腦→內容→電腦名稱
按變更
clip_image064
clip_image066
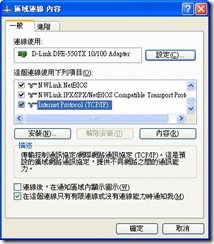
我的電腦→控制台→網路連線→區域連線→內容
選擇Internet Protocol(TCP/IP),按內容
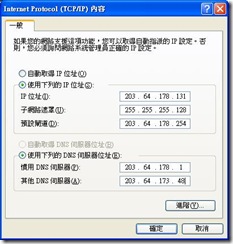
clip_image068
設定IP與 DNS資訊
clip_image070
開始→電腦關機→重新啟動

十、 Step 7測試群組與IP
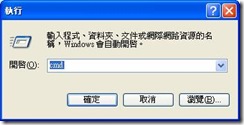
開始→執行→輸入cmd
clip_image072
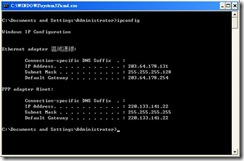
輸入ipconfig
clip_image074
將所有PC*停留此畫面檢查
選擇任一PC進入網路芳鄰檢查群組中是否有所有電腦
十一、 參考資源
tftpd32 home page http://tftpd32.jounin.net/
用Ghost軟體實現基於PXE的網路硬碟克隆http://tools.yesky.com/15/2187015.shtml
GHOST V8.0 使用詳解 http://www.51testing.com/html/31/566.html
神出鬼沒 揭開Ghost 9的真面目 http://www.jcwcn.com/html/Ghost/16_48_07_890.htm
PXE——RPL的掘墓人 http://www.coollan.net/win98/PXE-RPL.htm
Intel® Boot Agent - PXE Related Resources http://www.intel.com/support/network/adapter/pro100/bootagent/sb/cs-008191.htm
Wake-On-LAN http://www.matcode.com/wol.htm
十二、 附錄一
由於使用者的權限會直接引響軟體的使用,所以切記在製作映像檔前需先登入所有使用者的操作環境,測試每一項自行安裝的軟體,否則事後的補救是極浪費時間與人力的。
一般的權限問題設置軟體執行目錄權限來解決,而某些特定的軟體則需另行找尋解決方法,已知目錄權限問題的軟體如下:
l Dr.eye 6
l Apache 2.x
l Mysql 4.0
l Cakewalk 9
l C++Builder 6
l …
操作步驟:
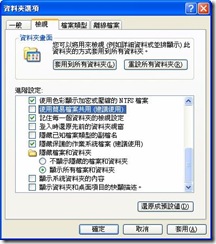
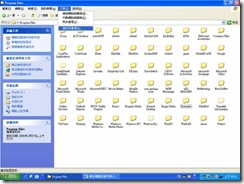
在任一資料夾→工具→資料夾選項
clip_image076
檢視→勾除”將使用簡易檔案共用”
clip_image078
以Dr.eye為例:
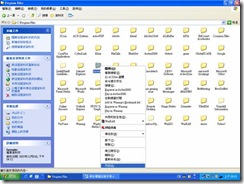
在C:\Program Files\Inventec 右鍵→內容
clip_image080
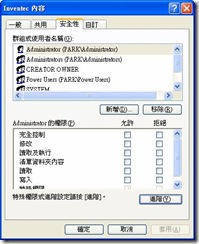
選安全性→按進階
clip_image082
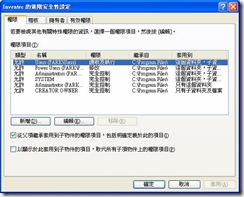
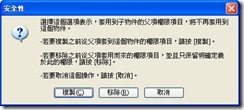
勾除”從父項繼承套用到子物件…”
clip_image084
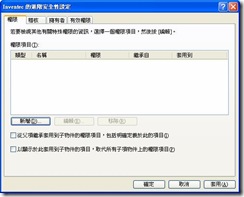
按移除
clip_image086
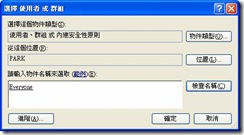
按新增
clip_image088
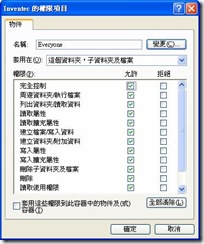
輸入Everyone,按確定
clip_image090
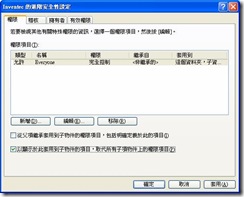
勾選完全控制,按確定
clip_image092
勾選 “以顯示從此套用到子物件…”,按確定
clip_image094
特定軟體
l SQL Server
解決步驟:
1. 將目錄權限開啟
2. 建置SQL使用者帳號