在挖資料時發現以前寫的安裝手冊,把它丟上來給有需要的人
-------------------------------歷 史 的 分 隔 線-----------------------------------
一、... 傳播架構... 1
二、... 硬體環境... 1
三、... 軟體環境... 1
四、... Step 1前置步驟... 2
五、... Step 2製作開機映像檔... 3
六、... Step 3製作PXE開機選單... 8
七、... Step 4製作Ghost映像檔... 12
八、... Step 5多點傳播... 16
九、... Step 6修改各PC端IP、Hostname 19
十、... Step 7測試群組與IP.. 21
十一、參考資源... 21
十二、附錄一... 22
一、 傳播架構

PC1為製作映像檔之電腦,Multicast Server為傳播映像檔給所有電腦之伺服器,其傳播過程分為兩階段,其一:PC1 經由網路
備份映像檔至Multicast Server (Step1 - 4),其二:Multicast Server 經由網路
還原映像檔給所有電腦,過程中所以使用的技術(DHCP、TFTP、PXE、GHOST)可於參考資源中查尋。
二、 硬體環境
l PC兩部(一台為Server另一台為製作映像檔用)
l PC需有PXE開機功能
l PC與Multicast Server需連接網路,屬同網段
三、 軟體環境
l Norton Ghost v8.2 Corporate Edition
l 3com Dynamic Access Boot Services
l Tftpd32 v2.83
四、 Step 1前置步驟
PC1:
依老師需求規劃分割區、安裝系統、使用者帳號和權限、網路群組名稱、TCP/IP資訊、軟體
Note
若有多個系統則考量是否需另外安裝開機選單
部份軟體在不同使用者會有註冊檔、權限問題,需登入各使用者環境,執行各類軟體測試(參閱附錄一)
Multicast Server:
安裝Ghost Enterprise、DABS、tftpd32
Note
安裝3com DABS 時安裝種類為Server
 五、 Step 2製作開機映像檔
Multicast Server:
五、 Step 2製作開機映像檔
Multicast Server:
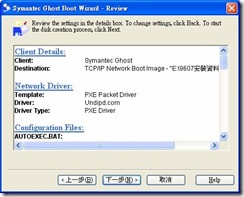
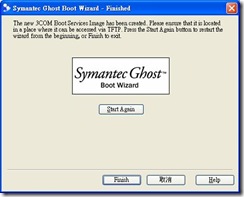
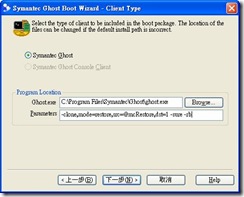
執行Ghost boot wizard
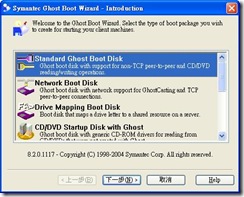
挑選TCP/IP Network Boot Image

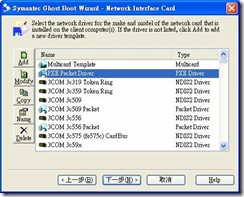
挑選PXE Packet Driver

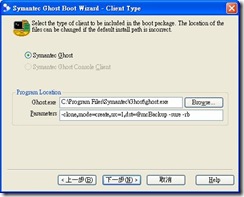
l 製作Ghost映像檔參數(用於Step 4):以Session Name 為Backup
-clone,mode=create,src=1,dst=@mcBackup -sure –rb
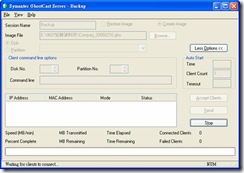
l 多點傳播參數(用於Step 5): 以Session Name 為Restore
-clone,mode=restore,src=@mcRestore,dst=1 -sure -rb


 六、 Step 3製作PXE開機選單
Multicast Server:
六、 Step 3製作PXE開機選單
Multicast Server:
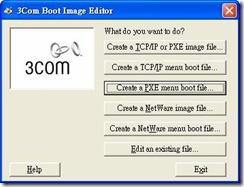
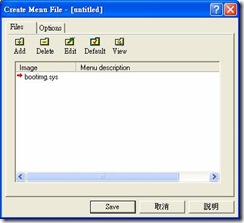
執行Boot Image Editer
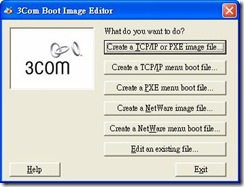
按Create a PXE menu boot file
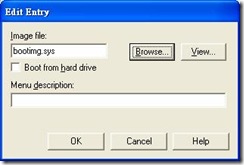
按Add
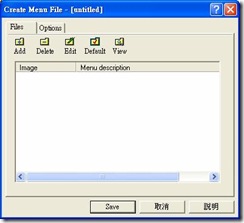
按Browser挑選開機檔案存檔位址
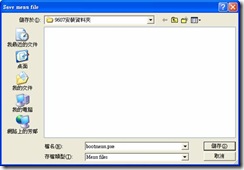
按Save
選取開機選單存檔位址(需與開機映像檔為同一資料夾)
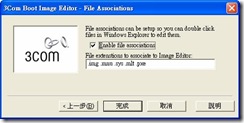
Note
第一次執行Boot Image Editor則會出現下列畫面(皆預設選項即可)


 七、 Step 4製作Ghost映像檔
Multicast Server:
七、 Step 4製作Ghost映像檔
Multicast Server:
我的電腦→控制台→網路連線→區域連線→內容
更改為虛擬IP(可避免與實體IP的衝突)
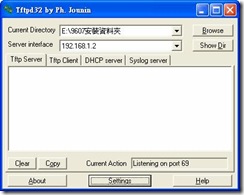
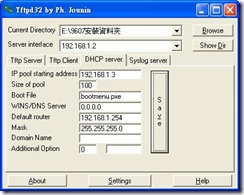
執行TFTPD32
按Settings
勾選PXE Compatibility,按OK
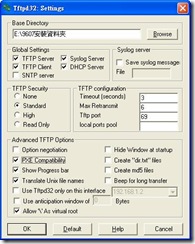
設定下列資訊,按Save
啟動GhostCast Server
設定下列資訊
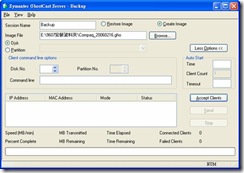
按Accept Clients
 PC1:
PC1:
進入BIOS將網路開機功能開啟
重新開機後PC1會經由網路取得 IP設定→開機選(bootmenu.pxe)→開機映像檔(bootimg.sys)→進入Ghost畫面與開始傳輸)
Note
如果在備份或還原過程過於緩慢或過多PC中斷,可能有電腦正在傳送大量封包或病毒干擾(將其暫停傳輸)
八、 Step 5多點傳播
Multicast Server:
啟動GhostCast Server
設定下列資訊

Note
這時的開機映像檔參數為下(作法請方參照Step 2)
按Accept Clients

先執行下列PC步驟,當所有電腦都連線時即可按下Send開始傳送
所有要安裝的PC(需與PC1為同一機型):
進入BIOS將網路開機功能開啟
(重新開機後PC1會經由網路取得bootmenu.pxe並執行預設的bootimg.sys進入Ghost畫面與開始傳輸)
Note
如果已設好PXE的電腦可以用Wake-On-LAN的方式分段式的啟動
MC-WOL ethernet-address [/a ip-address] [/p password]
Example1: MC-WOL 00:01:02:58:A3:C7
需注意如同時啟動過多電腦則會導致bootimg.sys傳輸中斷
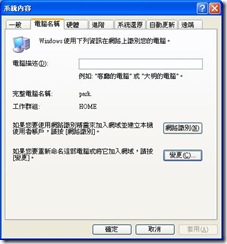
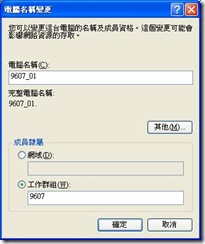
九、 Step 6修改各PC端IP、Hostname
我的電腦→內容→電腦名稱
按變更
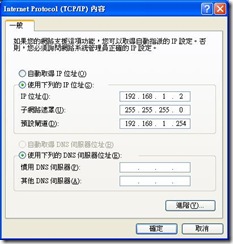
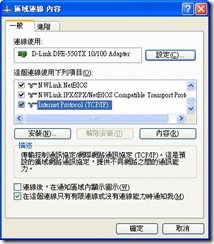
我的電腦→控制台→網路連線→區域連線→內容
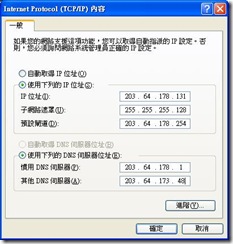
選擇Internet Protocol(TCP/IP),按內容
設定IP與 DNS資訊
開始→電腦關機→重新啟動
十、 Step 7測試群組與IP
開始→執行→輸入cmd
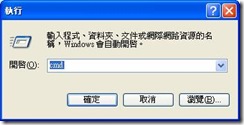
輸入ipconfig
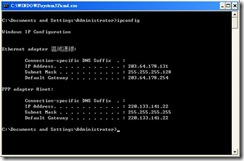
將所有PC*停留此畫面檢查
選擇任一PC進入網路芳鄰檢查群組中是否有所有電腦
十一、 參考資源
tftpd32 home page
http://tftpd32.jounin.net/
用Ghost軟體實現基於PXE的網路硬碟克隆
http://tools.yesky.com/15/2187015.shtml
GHOST V8.0 使用詳解
http://www.51testing.com/html/31/566.html
神出鬼沒 揭開Ghost 9的真面目
http://www.jcwcn.com/html/Ghost/16_48_07_890.htm
PXE——RPL的掘墓人
http://www.coollan.net/win98/PXE-RPL.htm
Intel® Boot Agent - PXE Related Resources
http://www.intel.com/support/network/adapter/pro100/bootagent/sb/cs-008191.htm
Wake-On-LAN
http://www.matcode.com/wol.htm
十二、 附錄一
由於使用者的權限會直接引響軟體的使用,所以切記在製作映像檔前需先登入所有使用者的操作環境,測試每一項自行安裝的軟體,否則事後的補救是極浪費時間與人力的。
一般的權限問題設置軟體執行目錄權限來解決,而某些特定的軟體則需另行找尋解決方法,已知目錄權限問題的軟體如下:
l Dr.eye 6
l Apache 2.x
l Mysql 4.0
l Cakewalk 9
l C++Builder 6
l …
操作步驟:
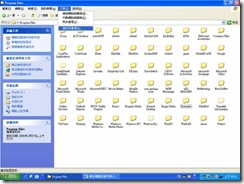
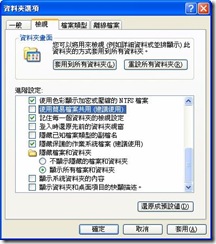
在任一資料夾→工具→資料夾選項
檢視→勾除”將使用簡易檔案共用”
以Dr.eye為例:
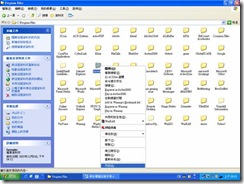
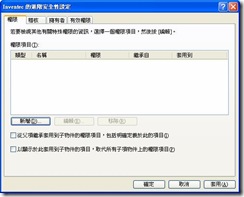
在C:\Program Files\Inventec 右鍵→內容
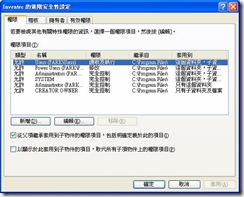
選安全性→按進階
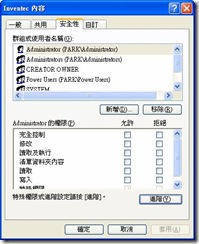
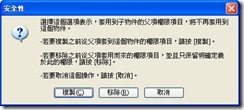
勾除”從父項繼承套用到子物件…”
按移除
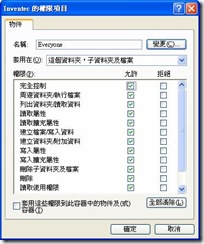
按新增
輸入Everyone,按確定

勾選完全控制,按確定
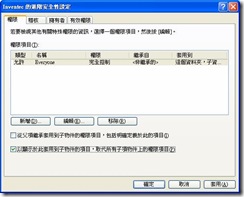
勾選 “以顯示從此套用到子物件…”,按確定
特定軟體
l SQL Server
解決步驟:
1. 將目錄權限開啟
2. 建置SQL使用者帳號


